
I've been on a retro Apple device kick for a little while and have recently been going through a backlog of old Apple systems from Apple II Classics to G3's and G4's to mid-2000's Macbook Pros and getting them cleaned up, upgraded and running like they're new from factory. Some of these projects have been for practical purposes, as I have dozens of 90's era handheld gadgets like PDAs and MP3 players that I need (well, more like want, as emulation and USB adapters are a thing but they're boring) serial ports and legacy operating systems to run them on natively. But one of the most iconic, impressive, and downright cool looking (to me at least) laptops of all time, the 1st-generation Apple iBook, incorporates a very, very non-replaceable or accessible hardware design that requires essentially disassembling the entire computer to access even the most basic parts such as the hard drive.

In the end it's just a laptop like any other, nothing too proprietary, but the process is arduous and it was pretty fun to actually document the teardown and rebuild on camera. Here is a condensed slideshow of the process you need to go through to- in my case specifically- go through to replace the hard drive and display assembly.
This project ultimately was meant to:
Upgrade the 20GB IDE HDD to a 64GB SSD (still over IDE of course)
Dual-boot OS X 10.3 and OS9
Max out the RAM
Max out the CPU (used a donor/for-parts laptop with a 466MHz CPU to put into a very good condition chassis that originally had a 300MHz CPU)
Replace the LCD panel (original chassis had a badly damaged screen)
Install an Airport card for my isolated legacy-device-only Wireless A/B/G network (using WEP keys for these extremely old systems)
It's currently a work in progress and 95% complete, and this post will be updated accordingly as I get the dual-boot SSD to boot OS9 properly, but otherwise this was a successful and satisfying project I loved completing even with the ridiculous design that requires essentially full disassembly and reassembly to even test components like that new SSD.
Here's a cool overall teardown video:
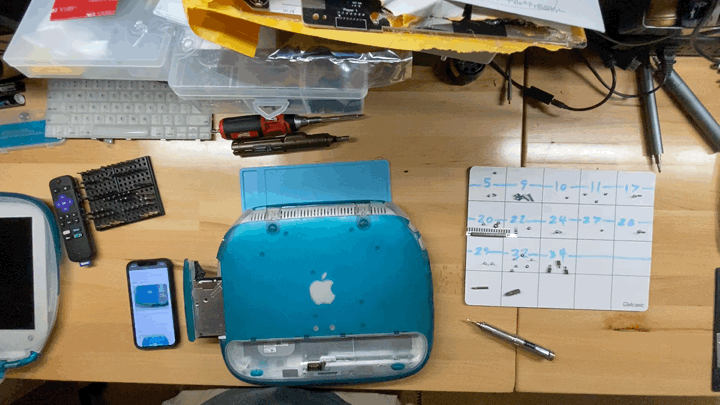
Here is the donor board's fully torn down to access the HDD:

And here's the 'good' chassis fully torn down, with the new donor's motherboard (from above picture) installed:

And here it is all buttoned up, looking new again:
